
Owning a car comes with a certain sense of pride, but nothing ruins that feeling faster than discovering a scratch on your car’s gleaming surface.
Whether it’s a result of a minor parking mishap, an overzealous kid with a bike, or simple wear and tear, car scratches are almost inevitable. The good news is you don’t always need a costly trip to the auto body shop to fix them.
In this TazaJunction.com comprehensive guide, we’ll show you how to remove scratches from car at home and restore that showroom shine.
We’ll walk you through the types of scratches, the best methods for repairing them, and how to make your car shine again like it just rolled off the lot.
Table of Contents
Understanding Car Scratches: What Are You Dealing With?
Before jumping into the repair process, it’s important to understand the type of scratch you’re dealing with. Not all scratches are created equal, and some may require different approaches.
1. Clear Coat Scratches
These are the most superficial and only affect the clear coat layer of your car’s paint. They often result from improper washing techniques, light brushes with branches, or dust.
2. Paint Scratches
These go deeper than the clear coat and expose the colored paint beneath. These scratches are more visible and may need more work to repair.
3. Primer or Deep Scratches
These scratches penetrate all the way to the primer or metal underneath. You can often feel these with your fingernail, and they may require professional touch-ups.
Tools and Products You’ll Need
To remove scratches from car, you’ll need a few essential tools and products. Here’s a basic list:
- Microfiber towels
- Scratch removal compound or polish
- Buffing pad or polishing machine (optional)
- Car wax or sealant
- Touch-up paint (for deep scratches)
- Sandpaper (for serious repairs – 2000 to 3000 grit)
With these items on hand, you’re ready to tackle a range of scratches and restore your car’s finish.
Step-by-Step Guide to Remove Scratches from Car
Let’s dive into the step-by-step process of remove scratches from car, starting with the mildest damage and working up to deeper imperfections.
Step 1: Clean the Area
Before attempting any repair, thoroughly clean the scratched area. Dirt and debris can interfere with the polishing process and cause further damage.
- Wash the scratched area with car shampoo and rinse it thoroughly.
- Dry it using a microfiber cloth to avoid new scratches.
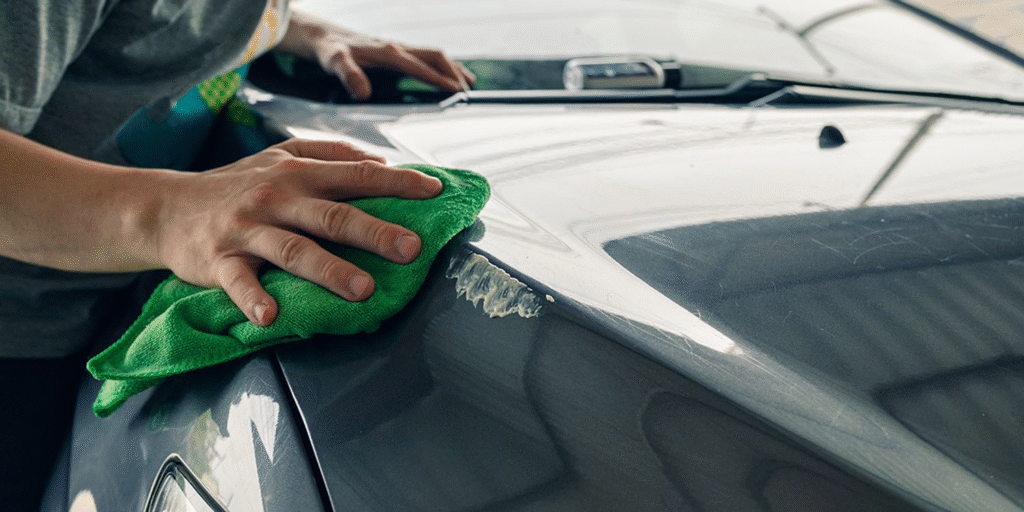
Step 2: Use a Scratch Removal Compound
For light to moderate scratches, a scratch removal compound is your best friend.
- Apply a small amount of compound to a microfiber towel or applicator pad.
- Rub it into the scratch in small circular motions for 30 to 60 seconds.
- Buff the area with a clean, dry microfiber towel.
- Repeat the process if necessary.
This method works best for clear coat scratches and can often make them disappear completely.
Step 3: Try Polishing the Surface
If the scratch is slightly more noticeable or hasn’t responded to compound alone, try using a car polish.
- Apply polish to the scratched area.
- Use a polishing pad or machine buffer to work it in.
- Continue polishing until the scratch diminishes or blends in.
Polishing also helps to make your car shine again by enhancing the depth and clarity of the paint.
Step 4: Apply Touch-Up Paint (for Deep Scratches)
If the scratch has gone through the paint layer and exposed the primer or metal, touch-up paint may be needed.
- Clean the area thoroughly.
- Use a fine brush or pen-style applicator to apply a small amount of matching paint.
- Allow it to dry fully—this can take several hours or even overnight.
- Once dry, use a rubbing compound and polish to smooth the area.
Touch-up paint won’t make the scratch invisible, but it can significantly improve appearance and prevent rust.
Step 5: Wet Sanding (Advanced Method)
For serious scratches or uneven touch-up jobs, wet sanding might be the most effective method.
- Use 2000-3000 grit sandpaper soaked in water.
- Lightly sand the scratched area in a horizontal motion.
- Be careful not to sand too deep into the paint.
- Once smooth, polish and wax the area for shine and protection.
This technique should only be attempted if you’re confident or experienced, as improper sanding can cause more harm than good.
Step 6: Finish With Wax or Sealant
Once the scratch is removed or minimized, protect your work and make your car shine by applying a coat of car wax or sealant.
- Wax restores shine and adds a protective layer to the paint.
- It also helps prevent future scratches and paint fading.
Apply wax in small, circular motions with an applicator pad, then buff with a clean microfiber towel for a brilliant finish.
DIY Scratch Repair vs. Professional Help
While it’s satisfying to remove scratches from car on your own, there are times when professional help is the better option.
When DIY Works Best:
- Light scratches and swirl marks
- Surface-level clear coat damage
- Minor cosmetic improvements
When to Seek Professional Help:
- Deep scratches that expose bare metal
- Scratches that span large areas
- You’re unsure or don’t want to risk damaging the paint
Knowing your limits can save you time, money, and potential damage.
How to Prevent Future Scratches?
An ounce of prevention is worth a pound of cure. Once you’ve managed to make your car shine again, you’ll want to keep it that way. Here are some tips to avoid future scratches:
- Avoid automatic car washes with harsh brushes.
- Use proper washing techniques with microfiber mitts.
- Park wisely and away from tight spots or dense trees.
- Cover your car if it’s parked outdoors regularly.
- Apply paint protection film or ceramic coating if you’re serious about long-term protection.
Final Thoughts
Scratches on your car can be an eyesore, but they don’t have to be permanent. With the right tools, a little time, and some know-how, you can remove scratches from car and make it shine again without spending hundreds at an auto shop.
From using scratch removal compounds to touch-up paint and polishing, there’s a solution for every level of damage. Just remember to be patient, work in a clean environment, and finish with wax or sealant to protect your results.
By following the steps outlined in this guide, you’ll not only restore your car’s beauty but also gain the satisfaction of having done it yourself.